Welcome to the Panasonic Bread Maker user manual․ This guide helps you unlock your appliance’s full potential, ensuring delicious homemade bread with ease and convenience․
1․1 Purpose of the Manual
This manual is designed to provide comprehensive guidance for using your Panasonic Bread Maker effectively․ It covers essential functions, safety tips, and maintenance to ensure optimal performance․ Whether you’re a novice or an experienced user, this guide will help you understand the appliance’s features and troubleshoot common issues․ By following the instructions, you’ll be able to bake delicious bread effortlessly while maintaining the longevity of your machine․ This manual is your go-to resource for getting the most out of your Panasonic Bread Maker and enjoying homemade bread with confidence․
1․2 Getting Started with Your Panasonic Bread Maker
Congratulations on acquiring your Panasonic Bread Maker! This section will guide you through the initial steps to ensure a smooth and enjoyable experience․ Start by carefully unboxing and placing the appliance on a stable, heat-resistant surface․ Familiarize yourself with the controls and components before first use․ Ensure all accessories are accounted for and understood․ Always refer to the safety precautions to avoid accidents․ With its user-friendly design, your Panasonic Bread Maker is ready to help you create delicious homemade bread effortlessly․ Explore the features, and let the baking begin!

Safety Precautions
Safety is crucial when using your Panasonic Bread Maker․ Always read this manual thoroughly and follow all guidelines to ensure safe and proper operation of the appliance․
2․1 Importance of Safety Guidelines
Safety guidelines are essential to prevent accidents, injuries, and appliance damage․ They ensure proper usage, maintain the bread maker’s performance, and prolong its lifespan․ Always prioritize caution when handling electrical appliances, especially near water or heat sources․ Failure to follow guidelines can lead to serious harm or malfunction․ Adhere to all warnings and instructions provided to guarantee a safe and enjoyable bread-making experience․ Proper safety practices protect both you and your appliance, ensuring years of reliable service․ Never overlook these precautions, as they are designed to safeguard your well-being and optimize the bread maker’s functionality․
2․2 Common Safety Precautions
Always unplug the bread maker before cleaning or maintaining it to avoid electrical shock․ Keep the appliance away from water and never submerge it․ Avoid touching hot surfaces, as they can cause burns․ Ensure the bread maker is placed on a stable, heat-resistant surface․ Keep children away from the appliance while it is in operation․ Never use damaged cords or plugs, as they can pose a fire hazard․ Avoid overloading the bread pan, as this may lead to uneven baking or machine malfunction․ Regularly clean the appliance to prevent dough residue buildup, which can affect performance․ Follow all safety guidelines to ensure safe and efficient operation․
2․3 Specific Safety Warnings for the Panasonic Bread Maker
Always follow the specific safety warnings provided for your Panasonic Bread Maker to ensure safe operation․ Avoid using abrasive cleaners or metal utensils, as they can damage the non-stick pan․ Never insert metal objects into the bread maker, as this may cause electrical damage․ Keep the appliance away from flammable materials, as the heating element can generate high temperatures․ Do not leave the bread maker unattended during operation, especially when children or pets are nearby․ Ensure the power cord is not overloaded or damaged, as this could lead to fire hazards․ Follow the manufacturer’s guidelines for maximum dough capacity to prevent overflow․ Refer to the manual for additional model-specific safety advice․

Parts and Accessories Overview
Explore the Panasonic Bread Maker’s exterior, interior, and accessories․ Understand the components like the baking pan, kneading blade, and control panel to maximize functionality and performance seamlessly․
3․1 Exterior Components of the Bread Maker
The Panasonic Bread Maker features a sleek, durable exterior designed for convenience and efficiency․ The lid allows easy access to the baking chamber, while the control panel and LCD display simplify operation․ The handles provide secure transport, ensuring stability during relocation․ The power cord is neatly positioned to prevent clutter․ Regular cleaning of the exterior with a damp cloth maintains its appearance․ For optimal performance, avoid placing the appliance near direct sunlight or moisture․ Proper placement on a stable, heat-resistant surface is recommended․ Familiarizing yourself with these components ensures smooth operation and longevity of your Panasonic Bread Maker․ Happy baking!
3․2 Interior Components and Their Functions
The interior of the Panasonic Bread Maker includes essential components designed for efficient bread making․ The bread pan, coated with a durable non-stick surface, holds the dough and ensures even baking․ The dough blade, located at the bottom of the pan, mixes and kneads the ingredients thoroughly․ The heating element, strategically positioned for uniform heat distribution, ensures proper rising and baking․ The interior walls are designed to reflect heat, promoting consistent cooking results․ These components work together to create a perfect loaf every time․ Regular cleaning and maintenance of these parts are crucial for optimal performance and longevity․ Always refer to the manual for care instructions․
3․3 Accessories Included with the Panasonic Bread Maker
Your Panasonic Bread Maker comes with essential accessories to enhance your bread-making experience․ The included measuring cup ensures precise ingredient measurements, while the sturdy spoon simplifies mixing․ A comprehensive recipe booklet provides inspiration and guidance for various bread types․ These accessories are designed to complement the appliance’s functionality, making the process straightforward and enjoyable․ The measuring cup and spoon are durable and easy to clean, while the recipe booklet offers tips for perfect loaves․ Together, these tools help you maximize your bread maker’s potential and explore a variety of recipes with confidence․ Always store accessories safely to maintain their quality and longevity․

Initial Setup and First Use
Unbox your Panasonic Bread Maker, ensuring all parts are intact․ Place it on a stable, heat-resistant surface and plug it in․ Before first use, inspect for damage and read the manual carefully to ensure proper operation․ This section guides you through initial steps to prepare your appliance for baking delicious homemade bread effortlessly․
4․1 Unboxing and Placement of the Bread Maker
Carefully unbox your Panasonic Bread Maker and inspect for any damage․ Place it on a stable, flat, and heat-resistant surface, away from direct sunlight and water sources․ Ensure proper ventilation around the appliance for optimal performance․ Avoid placing it near flammable materials or in humid environments․ Before plugging in, ensure the power outlet matches the voltage requirements․ Position the bread maker at least 4 inches away from any walls or obstructions to allow adequate airflow․ Level the appliance to ensure even mixing and baking․ Once properly placed, plug in the unit and prepare for first use․ Always follow safety guidelines for placement․
4․2 Preparing for the First Use
Before using your Panasonic Bread Maker for the first time, wash all utensils and dry them thoroughly․ Dismantle the bread maker’s interior components, including the baking pan and dough blade, and wash them with warm soapy water․ Rinse and dry completely to prevent any residue․ Ensure the appliance is placed on a stable, flat surface as outlined in the previous section․ Plug in the bread maker and familiarize yourself with the control panel․ Avoid using abrasive cleaners or scrubbers, as they may damage the surfaces․ Once cleaned and assembled, your bread maker is ready for its first use․ Always follow the safety guidelines provided in the manual․
4․3 Initial Cleaning and Calibration
Before first use, clean the bread maker thoroughly․ Wash the baking pan, dough blade, and lid with warm soapy water, then dry completely․ Lightly wipe the exterior with a damp cloth․ Calibration ensures even baking․ Place the appliance on a level surface and adjust as needed using a spirit level․ Some models may require resetting the default settings․ Consult the manual for specific calibration instructions․ Proper calibration is crucial for consistent results․ After cleaning and calibration, your Panasonic Bread Maker is ready for its first use․ Always ensure all parts are dry to prevent rust or electrical issues․

Basic Operation Guide
Discover the simple steps to operate your Panasonic Bread Maker․ Learn to power on, select modes, and add ingredients for consistent, delicious results every time․
5․1 Understanding the Control Panel
The control panel is the heart of your Panasonic Bread Maker, featuring an intuitive LCD display and buttons for easy navigation․ Use the menu button to cycle through options like basic, whole wheat, and gluten-free modes․ The plus and minus buttons adjust settings such as crust color and timer․ The start/reset button begins or pauses the process, while the cancel button stops it entirely․ Familiarize yourself with these controls to customize recipes and ensure perfect results․ The panel’s simplicity makes it user-friendly, allowing you to explore various bread-making possibilities with confidence and precision․
5․2 Selecting Basic Menu Options
The Panasonic Bread Maker offers a range of basic menu options to suit your baking needs․ Choose from settings like Basic, Whole Wheat, Gluten-Free, or Sourdough to create a variety of bread types․ Use the menu button to scroll through options, and confirm your selection with the start button; Each mode is preset with ideal settings for temperature, mixing, and baking times․ For example, the Gluten-Free option ensures a longer resting time for better dough structure․ Familiarize yourself with these options to explore different bread types effortlessly․ Experiment with the menu to find your favorite recipes and achieve consistent, professional-quality results at home․
5․3 Starting and Stopping the Bread Making Process
To start the bread making process, select your desired menu option and settings, then press the Start button․ The machine will confirm with a beep and begin mixing and baking․ To stop the process, press and hold the Stop button until the machine beeps and stops․ Note that stopping mid-cycle may require a short cooldown period before opening the lid․ Avoid stopping frequently, as this can disrupt the bread-making process․ Always allow the cycle to complete for optimal results․ If you need to pause, ensure the machine is in a safe state before opening․ Proper operation ensures consistent, high-quality bread every time․

Advanced Features of the Panasonic Bread Maker
Discover advanced features like programmable timers, delay start, and customizable settings, allowing you to tailor bread-making to your preferences for ultimate flexibility and precision in every loaf․
6․1 Programmable Timer and Delay Start
The programmable timer allows you to set baking times up to 24 hours in advance, ensuring freshly baked bread exactly when you want it․ The delay start feature lets you prepare ingredients and set the timer, so the bread maker begins working at your specified time․ This is ideal for waking up to freshly baked bread or having it ready after a long day․ Both features work seamlessly together, offering convenience and flexibility for any schedule․ Simply input your desired time and let the Panasonic Bread Maker handle the rest for perfect results every time․
6․2 Customizing Your Bread Settings
The Panasonic Bread Maker offers customizable settings to tailor your bread to your preferences․ Adjust the crust color to light, medium, or dark for the perfect finish․ Choose from various loaf sizes, including small, medium, or large, to suit your needs․ You can also customize the yeast type, ensuring optimal rise for different recipes․ Additionally, the bread maker allows you to set specific times for the kneading, rising, and baking phases, giving you full control over the bread-making process․ These customization options empower you to experiment with diverse recipes and achieve consistent, professional-quality results tailored to your taste preferences․
6․3 Special Modes and Functions
The Panasonic Bread Maker features several special modes to enhance your bread-making experience․ The Rapid Bake Mode allows you to bake bread faster, perfect for busy days․ The Gluten-Free Mode adjusts kneading and rising times for gluten-free recipes․ Additionally, the Sourdough Starter Mode enables longer fermentation for a more authentic sourdough taste․ You can also use the Yeast Proofing Function to activate yeast before mixing, ensuring a light and airy texture․ For pizza dough or rolls, the Dough-Only Mode prepares the dough without baking․ These modes provide flexibility, allowing you to create a variety of bread types and dough with ease and precision․
Ingredients and Measurements
This section covers essential ingredients and precise measurements for bread making, ensuring the best results․ Use quality ingredients and maintain the correct ratio․
7․1 Essential Ingredients for Bread Making
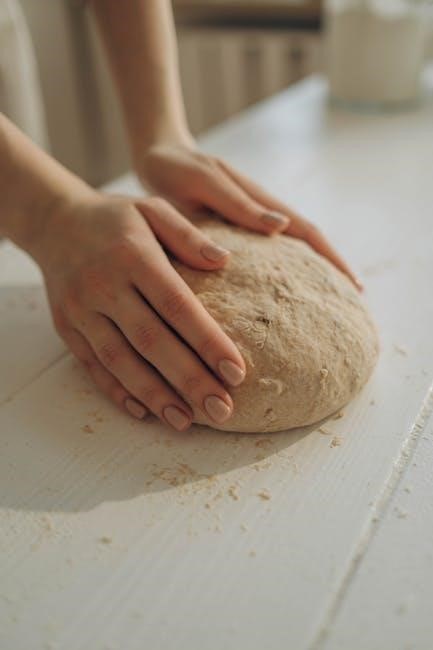
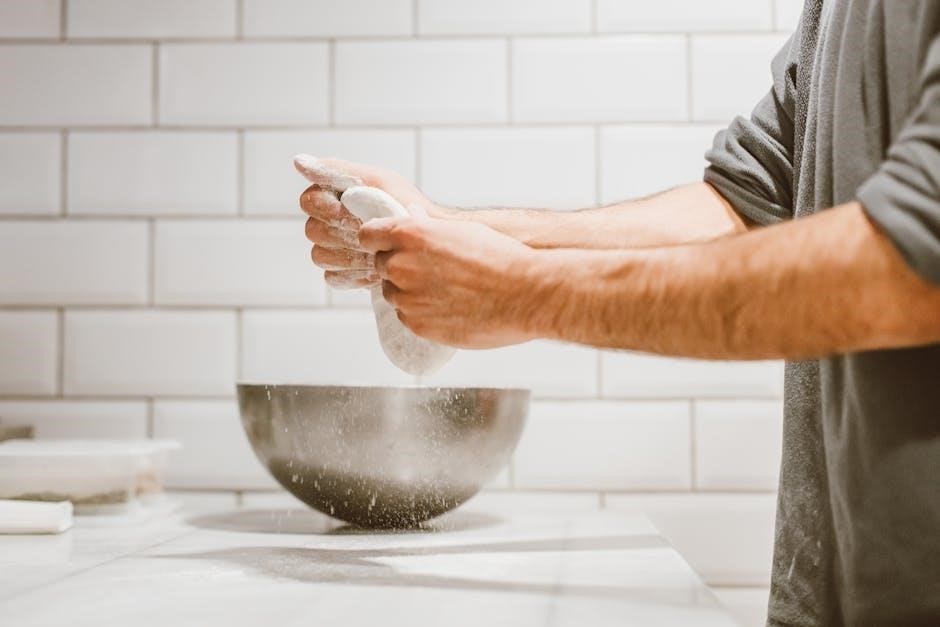
Bread making requires a few basic ingredients: high-quality flour, active yeast, salt, sugar, and water․ Flour provides structure, yeast ensures rise, and salt enhances flavor․ Sugar feeds yeast, while water hydrates ingredients․ Optional additions like butter, oil, or herbs can enhance texture and taste․ Always use fresh yeast for optimal rise and unbleached flour for better nutrition․ Precise measurements ensure balanced chemistry in dough formation․ Maintain proper ratios to achieve the perfect loaf․ Experiment with ingredients cautiously to avoid disrupting the bread’s fundamental composition and baking performance․
7․2 Measuring Ingredients Accurately
Accurate measurements are crucial for achieving the best results in bread making․ Use a digital scale for precise flour measurements, as cup measurements can vary․ Flour should be spooned into the cup and leveled to avoid packing․ Liquids should be measured using a clear measuring cup, ensuring the meniscus aligns with the desired mark․ Yeast and salt should be measured precisely, as excess or deficiency can affect rise and flavor․ Always use room-temperature liquids for optimal yeast activation․ A checklist can help ensure no ingredient is missed or mismeasured․ Consistent proportions are key to achieving the perfect loaf every time․
7․3 Adjusting Ingredient Quantities
Adjusting ingredient quantities allows you to customize your bread recipes to suit your preferences․ Start with the basic recipe, then modify ingredients gradually to avoid imbalances․ For example, increase yeast slightly for a faster rise or add a bit more sugar for a sweeter loaf․ When adding mix-ins like nuts or seeds, do not exceed 20% of the total flour weight to maintain dough integrity․ Similarly, adjust liquid content based on flour type and humidity․ Be cautious with salt and yeast, as overadjustment can negatively impact flavor and rise․ Always maintain the ratio of dry to wet ingredients for optimal results․ Experiment wisely and track your changes for consistent outcomes․
Troubleshooting Common Issues
This section guides you through resolving common problems with your Panasonic Bread Maker․ From uneven baking to machine errors, find solutions to get your appliance working smoothly again․
8․1 Identifying Common Problems
Identifying common issues with your Panasonic Bread Maker is the first step toward troubleshooting․ Issues may include the machine not turning on, uneven bread baking, or the dough not rising properly․ Error codes like “E01” or “E02” can indicate specific malfunctions․ Other problems might involve the bread maker overheating, making unusual noises, or failing to mix ingredients thoroughly․ If the machine stops mid-cycle or the bread crust is too dark or light, these are also signs of potential issues․ Recognizing these symptoms helps you address the root cause effectively and restore your bread maker to optimal performance․
8․2 Error Codes and Their Meanings
Your Panasonic Bread Maker may display error codes like “E01,” “E02,” or “E03,” indicating specific issues․ “E01” typically signifies a power or heating element problem, while “E02” may point to a sensor malfunction․ “E03” often relates to motor issues or excessive dough resistance․ Other codes like “E04” or “E05” could indicate temperature control failures or faulty timers․ Always refer to your manual for precise code meanings, as they may vary․ Addressing these codes promptly ensures your bread maker operates smoothly and prevents further damage; If unsure, consult the troubleshooting guide or contact Panasonic support for assistance․
8․3 Resolving Power and Operational Issues
If your Panasonic Bread Maker experiences power or operational issues, start by ensuring it is properly plugged into a working outlet․ Check the power cord for damage and verify that the outlet is functioning․ If the machine does not turn on, reset it by unplugging and replugging it․ For operational issues, ensure the bread pan is securely locked in place․ If the machine stops mid-cycle, check for obstructions or excessive dough resistance․ Unusual noises may indicate worn or misaligned parts․ If problems persist, refer to the error code list or contact Panasonic support for further assistance․ Regular maintenance can help prevent these issues․

Maintenance and Care Tips
Regular maintenance ensures optimal performance and longevity of your Panasonic Bread Maker․ Clean surfaces with a damp cloth, store in a dry place, and check parts for wear․
9․1 Cleaning the Bread Maker
Regular cleaning is essential to maintain your Panasonic Bread Maker’s performance․ Always unplug the appliance before cleaning․ Wipe the exterior with a damp cloth, avoiding harsh chemicals․ For the interior, remove the baking pan and kneading blade, washing them in warm soapy water․ If crusty residue is present, soak parts before scrubbing gently․ Avoid using abrasive cleaners or scourers to prevent damage․ Dry all components thoroughly to prevent rust․ Never submerge the main unit in water․ Cleaning after each use prevents dough residue buildup and ensures optimal hygiene․ Regular maintenance will extend the lifespan of your bread maker․
9․2 Storing the Appliance Properly
Store your Panasonic Bread Maker in a cool, dry place away from direct sunlight and moisture․ Ensure it is placed on a stable, flat surface․ Before storing, remove any detachable parts, such as the baking pan and kneading blade, and clean them thoroughly․ Store these parts separately in a dry location․ Avoid storing the appliance in humid environments, like basements or attics, to prevent mold or rust․ If storing for an extended period, ensure the appliance is completely dry to avoid condensation․ For added protection, use the original packaging or cover it with a breathable cloth․ Always keep it out of reach of children․
9․3 Replacing Parts and Accessories
To maintain your Panasonic Bread Maker’s performance, replace worn or damaged parts promptly․ Genuine Panasonic parts are recommended for compatibility and safety․ Common replacements include the baking pan, kneading blade, and rubber seals․ Contact Panasonic’s customer service or visit their official website to purchase authentic accessories․ Before replacing any part, ensure the appliance is unplugged and cool․ Follow the manufacturer’s instructions for detachment and installation․ Avoid using substitute parts, as they may void the warranty or cause malfunctions․ Regularly inspect parts for wear and replace them to ensure optimal baking results and extend the appliance’s lifespan․ Proper replacement maintains reliability and performance․

Frequently Asked Questions (FAQs)
This section addresses common inquiries about using your Panasonic Bread Maker, covering topics like troubleshooting, maintenance, and optimal performance to enhance your bread-making experience effectively․
10․1 General Usage Questions
How do I start using my Panasonic Bread Maker? Simply plug it in, add ingredients, and select your preferred settings․ Can I customize recipes? Yes, adjust ingredients to suit your taste․ What if the bread doesn’t bake evenly? Check ingredient measurements and ensure the dough is evenly spread․ Why does the machine make noise? It’s normal during operation․ How long does it take? Times vary depending on settings, typically 2-4 hours․ Can I leave it unattended? Yes, but monitor it near completion․ For more details, refer to the manual or contact support․
10․2 Technical Support and Warranty Information
For technical assistance, contact Panasonic’s customer support via phone, email, or their official website․ Refer to the contact details provided in the manual․ The warranty period varies by region but typically covers manufacturing defects for one year․ Register your product online to activate the warranty․ Repairs or replacements are free during this period for valid claims․ Misuse or unauthorized modifications may void the warranty․ Extended warranties may be available for purchase․ For troubleshooting, visit Panasonic’s support page or consult the FAQs section․ Keep your proof of purchase handy for warranty claims․ Visit Panasonic Support for more details․
10․3 Tips for Optimal Performance
To ensure your Panasonic Bread Maker performs at its best, always use fresh and high-quality ingredients․ Regularly clean the interior and exterior to prevent residue buildup․ Pre-measure ingredients accurately for consistent results․ Experiment with recipes but follow the manual’s guidelines․ For optimal dough rise, maintain a consistent room temperature․ Lubricate moving parts periodically to prevent wear․ If your model has a firmware update feature, ensure it’s up to date․ Avoid overloading the machine with excess ingredients․ For troubleshooting, refer to the FAQs or contact support․ Happy baking!
11․1 Summary of Key Features
The Panasonic Bread Maker is a versatile appliance designed for effortless bread making․ It features a user-friendly interface, multiple preset programs, and a programmable timer for convenience․ With a durable construction and non-stick baking pan, it ensures consistent results․ The appliance also includes a delay start function, allowing you to prepare ingredients in advance․ Its compact design and easy-to-clean surface make it a practical addition to any kitchen․ Whether you’re a novice or an experienced baker, this bread maker offers flexibility and reliability, helping you create a variety of bread types with minimal effort․ Its advanced features and simple operation make it a must-have for homemade bread enthusiasts․
11․2 Encouragement for Experimentation
Don’t be afraid to explore and experiment with your Panasonic Bread Maker! It’s designed to inspire creativity, allowing you to craft unique bread recipes tailored to your taste․ From classic white bread to hearty whole-grain loaves, or even gluten-free options, the possibilities are endless․ Try adding nuts, seeds, herbs, or spices to create flavorful variations․ The machine’s programmable settings and delay timer make it easy to test new ideas․ Remember, baking is an art that thrives on experimentation, and your Panasonic Bread Maker is the perfect partner for this culinary journey․ Keep exploring, and enjoy the joy of homemade bread!
11․3 Final Tips for Enjoying Your Panasonic Bread Maker
To fully enjoy your Panasonic Bread Maker, embrace its versatility and explore new recipes․ Keep ingredients fresh and precisely measured for consistent results․ Regularly clean and maintain the appliance to ensure longevity․ Experiment with different settings and modes to discover your favorite bread styles․ For troubleshooting, refer to the guide or contact support if needed․ Share your creations with family and friends, and don’t hesitate to try new ingredients or techniques․ With proper care and creativity, your Panasonic Bread Maker will become a trusted companion in your culinary adventures, providing fresh, homemade bread for years to come․ Happy baking!